Written By:
Eric Bakken
Facebook is a powerful tool that can help your business reach its target audience. With it, you can build brand awareness, sell your product, and generate leads by running a campaign through Facebook Ad Manager. Once set up, you will be able to segment Facebook users by interest, demographics, behaviors, and more to reach an audience that would find your business the most valuable to them!
Below, we will walk you through all the steps needed to create an ad account for your business through Facebook Ad Manager.
Things you’ll need:
- An existing Facebook page for your business. If your business doesn’t have a Facebook page yet, you can learn how to create a Facebook page for your business here.
- Admin access to your business’s Facebook page
- A personal Facebook account
- A payment method you’d like to use for your advertising (optional)
What is Facebook Business Manager?
Facebook Business Manager is a website owned by Facebook where businesses can manage their Facebook and Instagram advertising activities and business assets. What’s great about Facebook Business Manager is that it allows you to keep your business activities separate from your personal activities.
Some of those business assets we’ll touch base on in this guide are:
- Employees/Partners you’d like to provide access to
- Facebook Pages your business owns
- Payment Method you’d like to use for your ads
- Ad Account for your business
Learn how to craft posts that perform well on Facebook, download our free checklist!

1. Creating the Facebook Business Manager account.
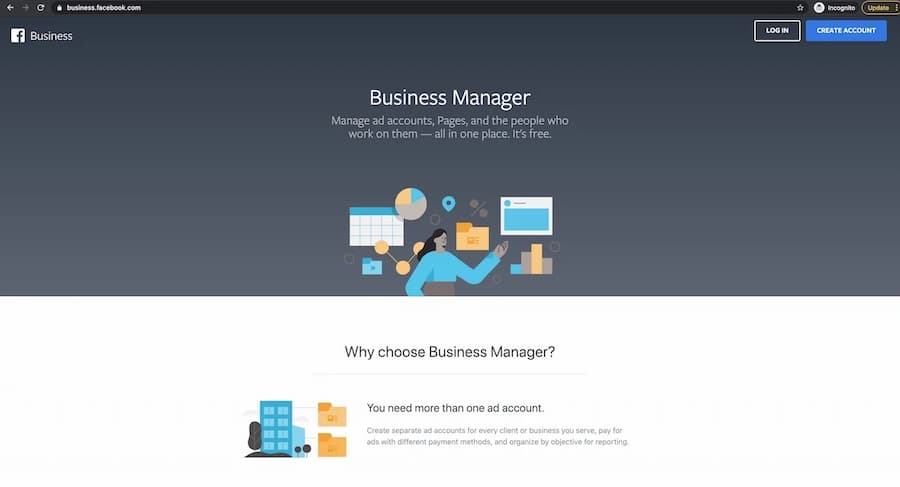
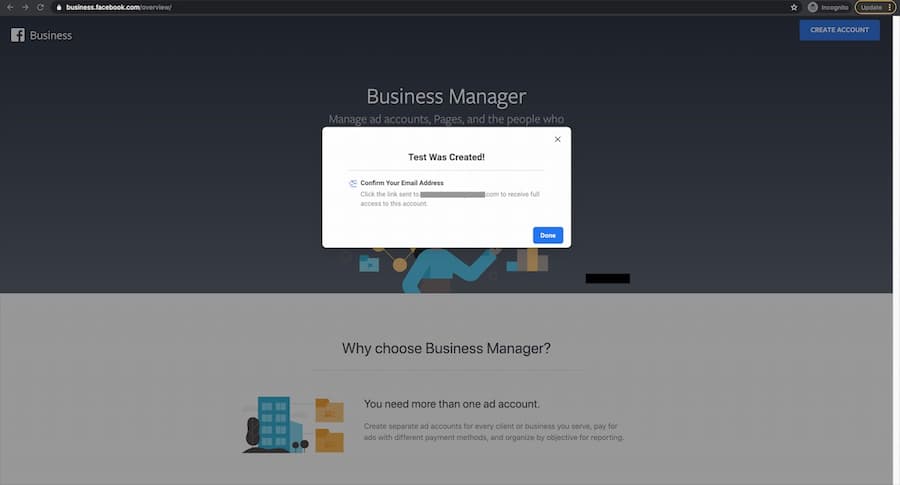
The first thing we’re going to do is navigate to Facebook Business Manager. The URL is business.facebook.com. Once you’re there you’ll want to select the button on the top right of the page that says ‘CREATE ACCOUNT.’
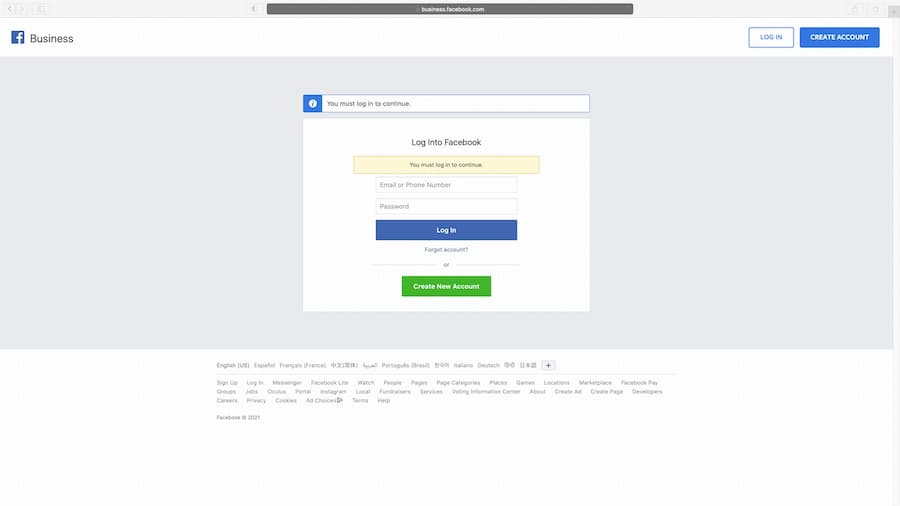
From there you will be asked to log Into Facebook to continue. You’ll want to make sure that you log in using the email address you use to get onto your personal Facebook account.
If you’re concerned about privacy or other coworkers viewing your page there’s no need to worry! This will only be used to verify who you are and as login credentials to get into Facebook Business Manager in the future.
Once logged in to your personal Facebook account, select the ‘CREATE ACCOUNT’ button again on business.facebook.com.
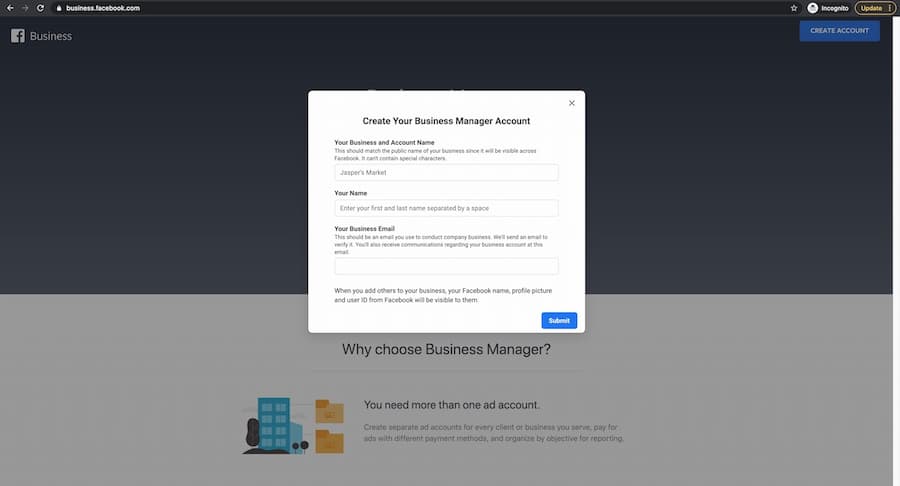
From here you’ll be prompted to fill out your:
- Business and Account name (make sure this is the same that is displayed on Facebook)
- Your name
- Your business email (make sure to use your work email address here)
Once you’ve submitted you’ll receive a message letting you know the account was created! From here, you’ll need to log into your work email address and confirm access.
In your work email inbox, locate the email in your inbox titled, ‘Confirm your business email’ from notification@facebookmail.com. From here you’ll want to select the ‘Confirm Now’ button.
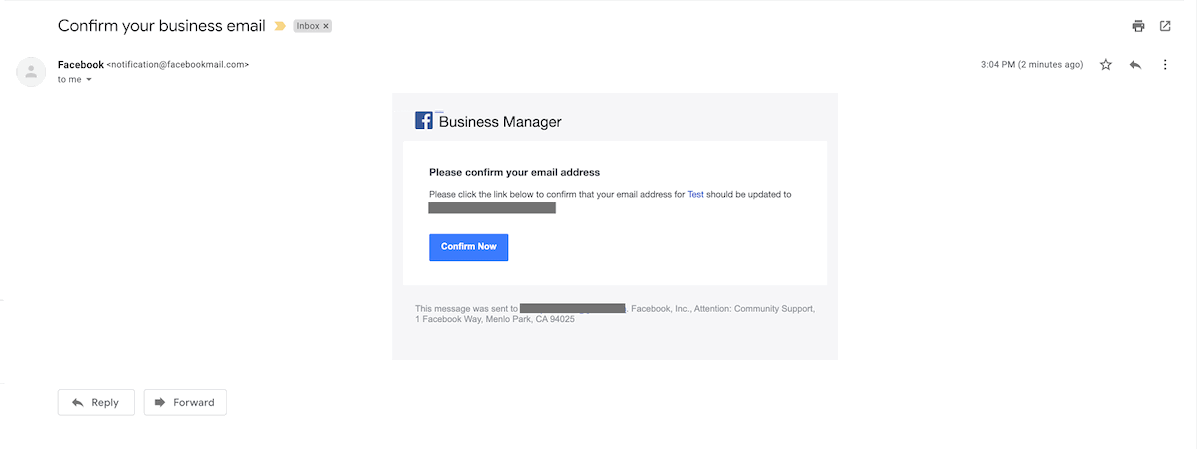
Confirming your email address will redirect you to the Facebook Business Manager settings page (business.facebook.com/settings). You’ve now created a Facebook Business Account for your business!
You can now control the users, pages, and assets related to your business. We’ll go over these items in the next few steps to make sure your account is set up properly.
2. Granting access to the business.
From the settings page (business.facebook.com/settings) you can now grant access to other employees and partners who will need to access the account.
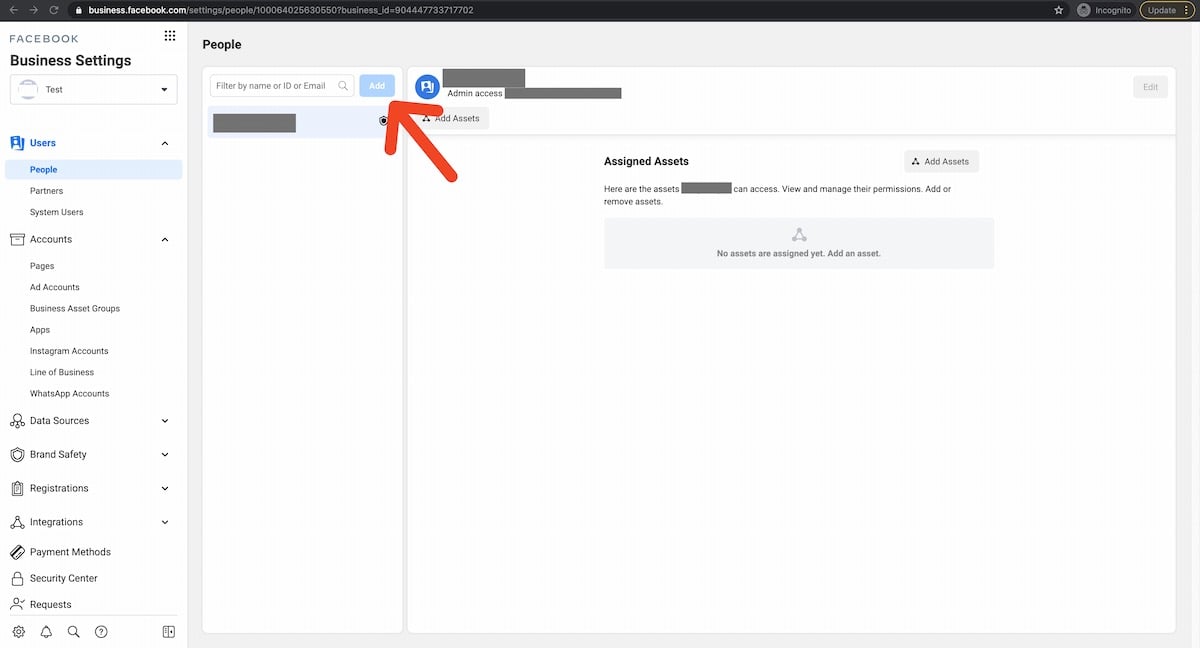
You can do this by going to the Users tab, selecting People, and inviting them by finding them by name, ID, or email address in the search bar. From there you’ll want to grant them the appropriate level access and send them the invite. Information on Facebook Business Manager roles can be found here.
We recommend adding a second admin right away at the very least. This should be a trusted employee who can control the account in the event you are unavailable. When inviting this person, you’ll want to grant them admin-level access. We recommend this because it means that if you were to accidentally lock yourself out of the account or remove yourself from the account, you know there is someone else who can re-grant you access. It happens more often than you might think!
3. Add your business’s Facebook page.
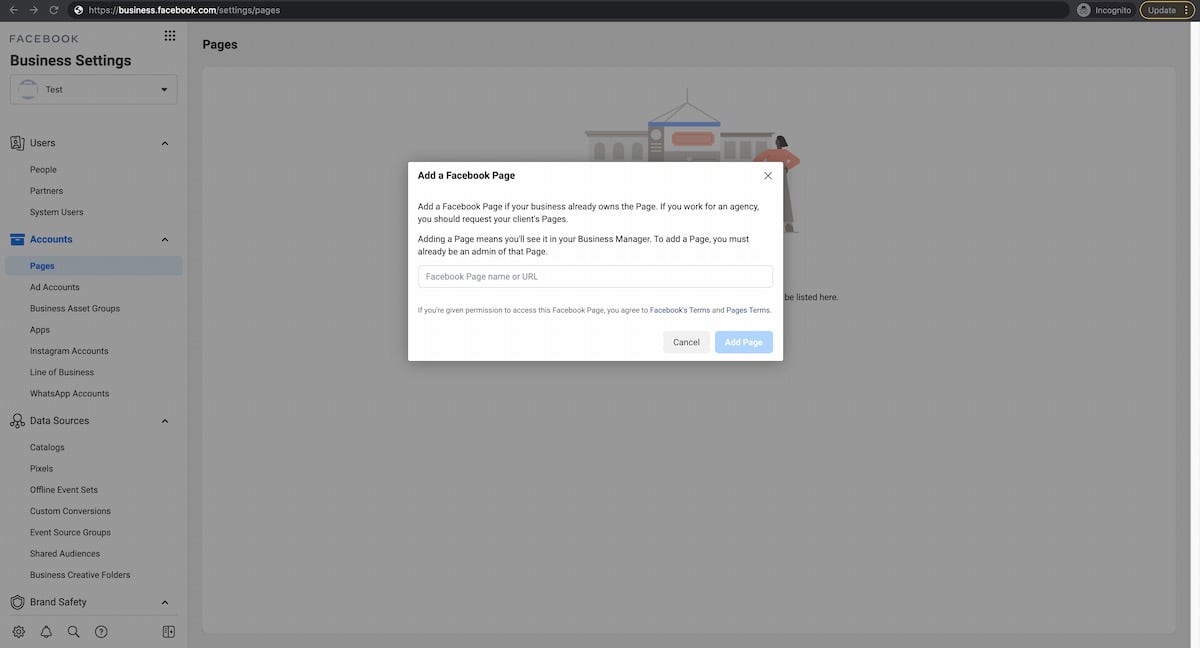
The next step is to link your business's Facebook Page to your business manager account. To do this you’ll want to locate ‘Pages’ under the accounts tab, select ‘add’ and then click ‘add a page’.
If you control your Business's Facebook page, your business's Facebook Page may already be displaying under this tab. If it is, you can move on to the next step.
If not, no worries! You will need to be an admin of your Business's Facebook page to link it to the business manager account.
To check if you’re an admin, you can log into your Facebook account, go to your business's Facebook page by clicking ‘pages’, go to the settings tab, and check under ‘page roles’. If you don’t have admin access to the page you will need to contact one of the admins so they can grant you this access from this page.
Improve your organic reach on Facebook, download our free pre-publishing checklist!

Once admin access is confirmed, you can simply plug the URL of your business’s Facebook page into the field on the ‘add a Facebook Page’ pop-up.
If your business has an Instagram Account, you also have the option to run ads on Instagram and promote your page on that platform. You can connect your Instagram account under the ‘Instagram Accounts’ tab. You’ll simply need to log in to connect there.
4. Add a payment method.
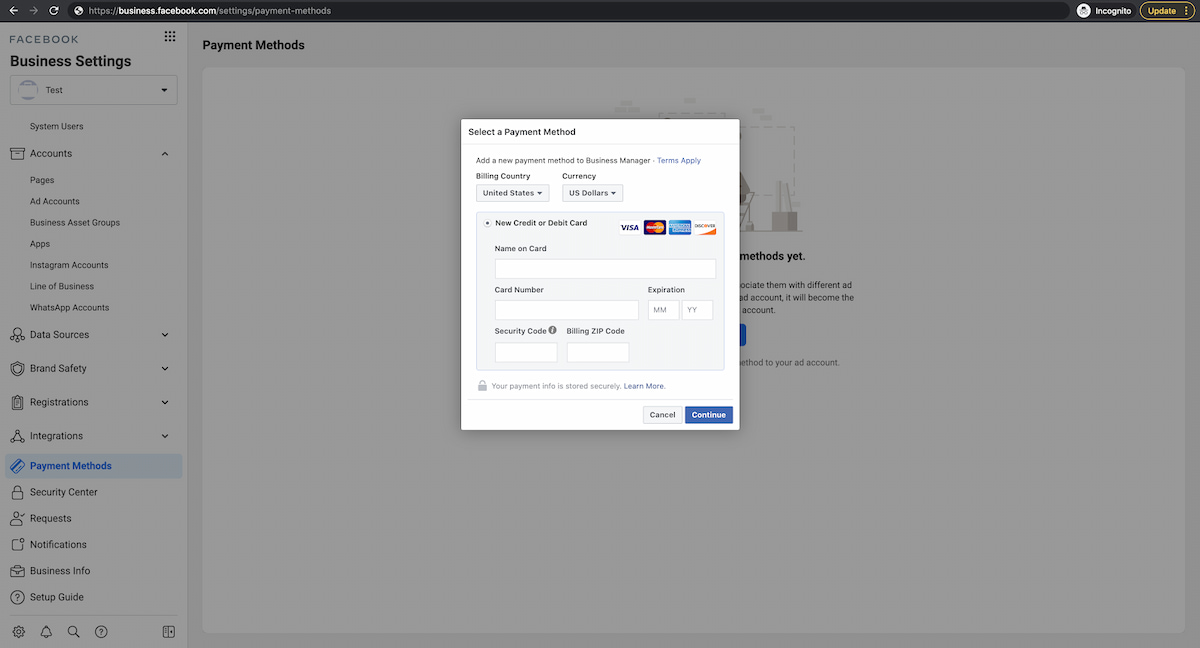
The next thing we’ll need to do is add a payment method. We’re going to set this up to be the payment method that will be charged when your business is running an advertisement. This payment method can always be changed, and if you don’t have this information available you can skip this step for now and come back to it when it’s time to run an ad.
You can add a payment method by scrolling down on the left-hand navigation bar to the ‘Payment Methods’ tab.
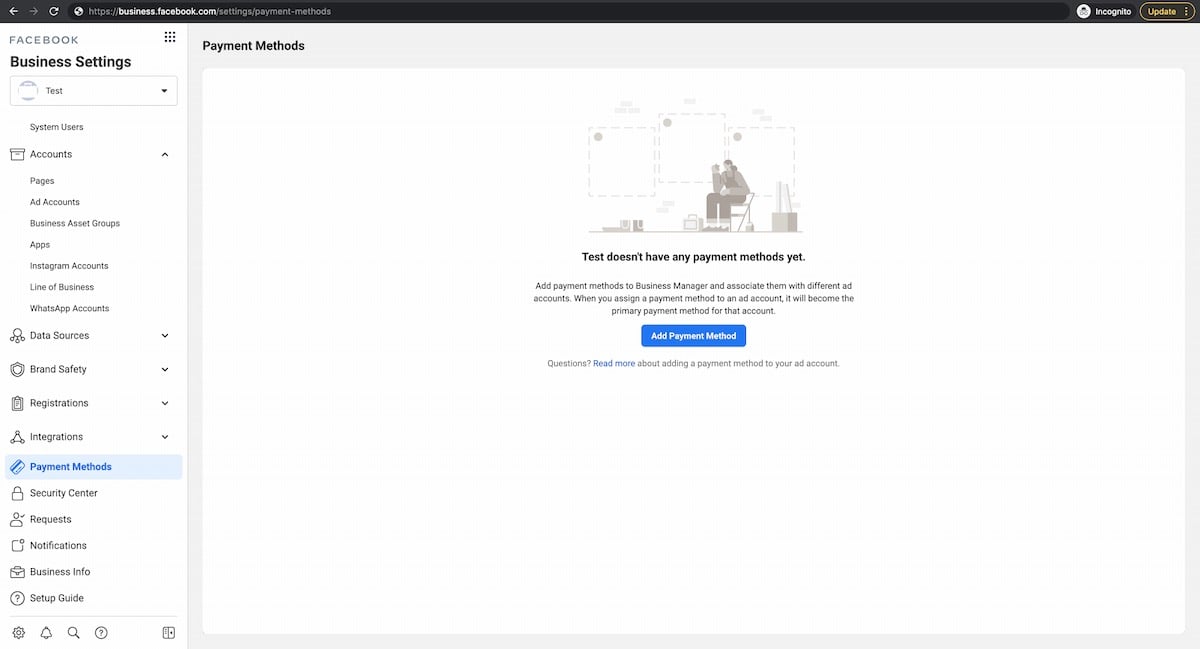
Select ‘Add Payment Method’ and fill out the Credit/Debit card information you would like to use for your advertising.
5. Create an Ad account.
We’re now ready to create an ad account for your business. This will be where you will be able to set up and run advertisements on Facebook and Instagram.
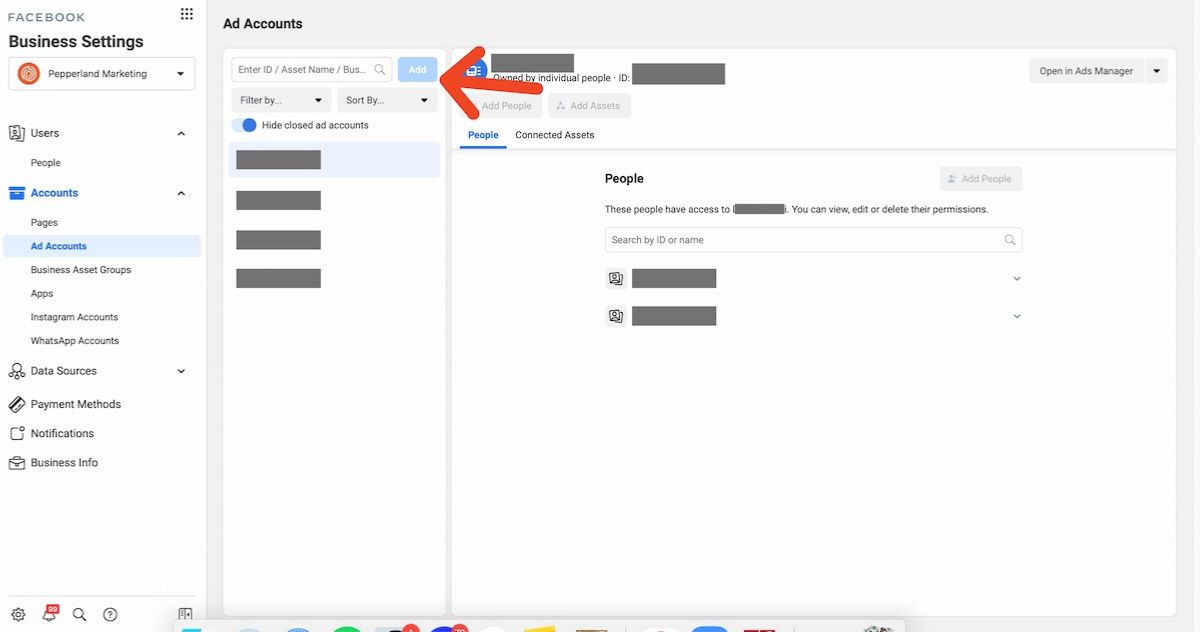
Navigate to the ‘Ad Accounts’ tab, select the blue ‘Add’ button, and click ‘Create a New Ad Account’. From the drop down menu select ‘Create a new ad account’.
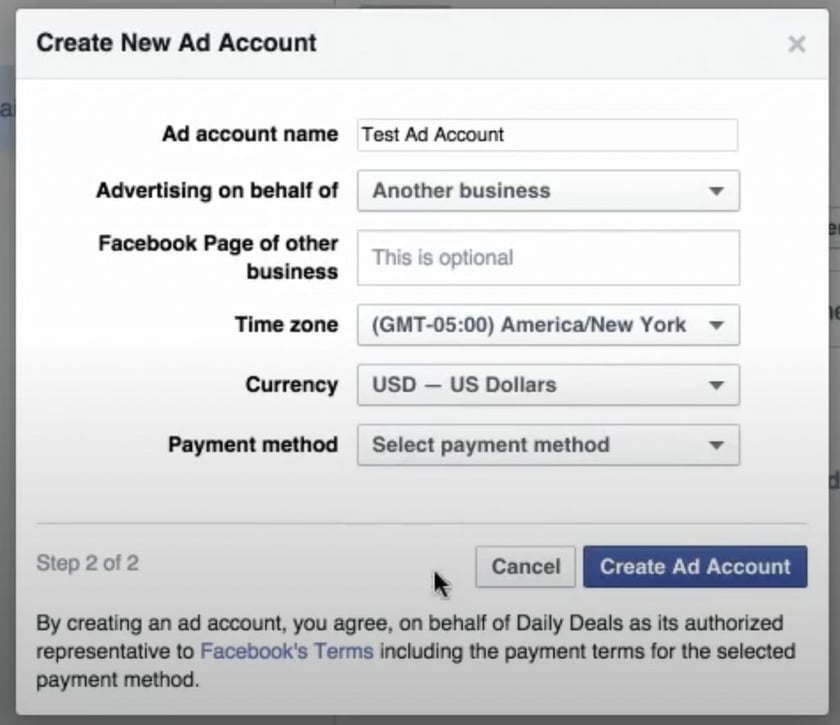
Simply name your ad account, select your business page, enter your time zone, currency, and the payment method.
Earlier we linked the business's Facebook page and created a Payment method, so those should appear as options for you to choose here.
Once you’ve filled out the necessary information, you can select ‘Create Ad Account’!
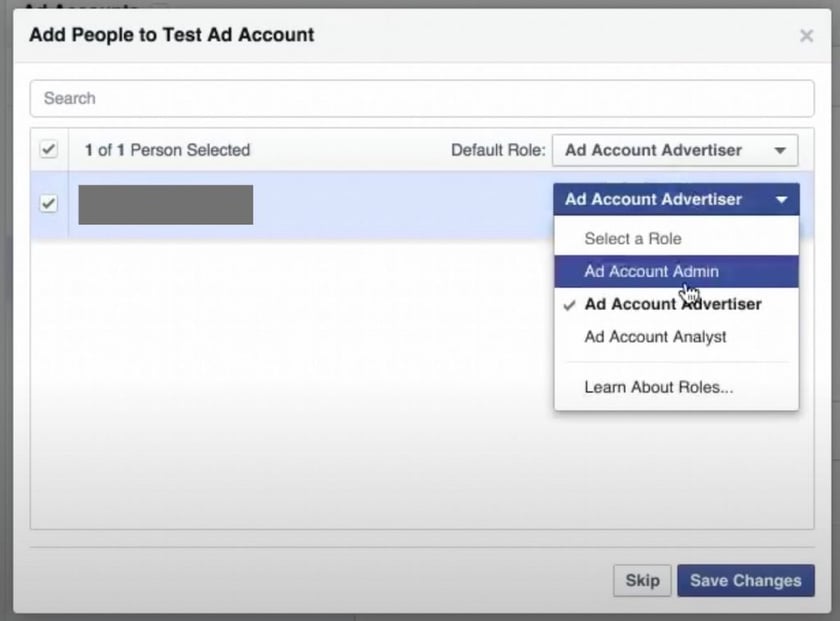
Next, you’ll want to select which users you want to add to this ad account and assign them access levels. There are several options to choose from. You can find out more about ad account roles here.
We recommend providing Ad Account Admin level access to the employee you provided admin access to earlier.
Congratulations, you’re now all set up to run ads for your business on Facebook!
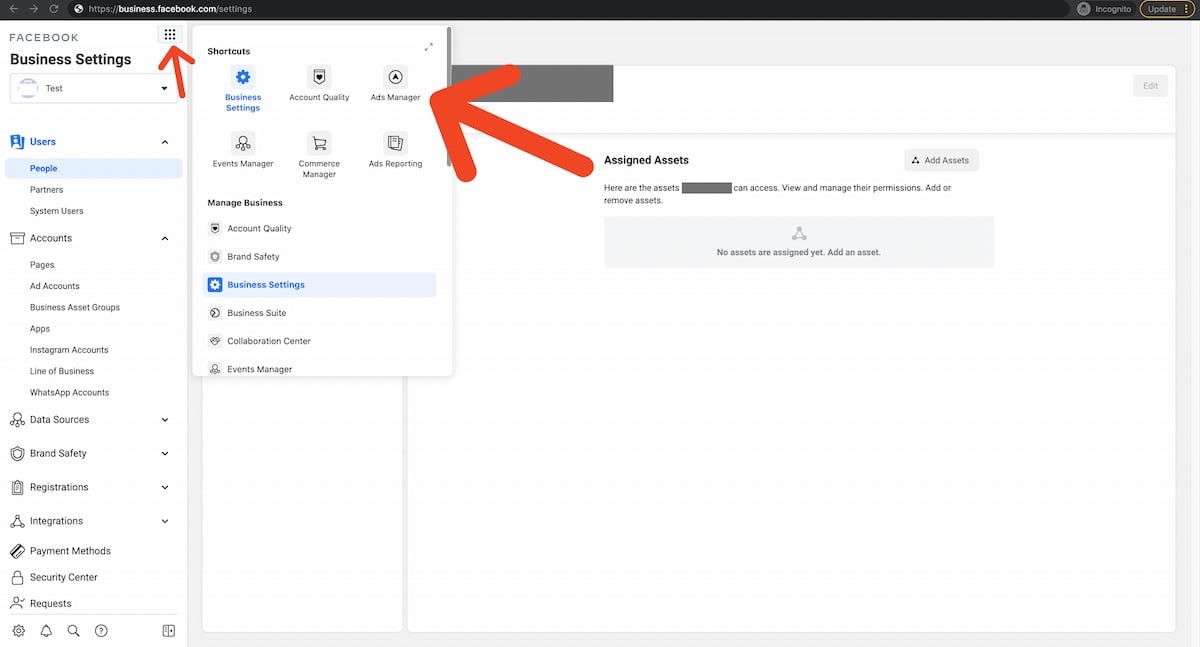
To access the Ads Manager where you will be able to create and run advertising campaigns for your business, select the square icon on the top left of the screen and click ‘Ads Manager’.
Just One Piece of an Effective Social Media Marketing Strategy
There’s a lot of factors that go into creating an effective social media marketing and advertising strategy. From reaching your desired target audience, to grasping your SMART social media marketing goals, your business will need to know to better aid in branding yourself.
Does your social strategy need a boost? Partnering with marketing specialists can help! At Pepperland, we specialize in inbound and content marketing and can help your business grow exponentially through our expertise and resources. Contact us today to find out how we can help achieve your goals.


