Facebook Pages offer a variety of features and services that aren’t available to regular profiles, most of which are free and perfect for businesses on a budget. By setting up your business page correctly, the possibilities of how you can promote your company, services, and content are endless.
What is a Facebook Page?
Pages are places on Facebook where you can connect with a target audience. Artists, businesses, brands, organizations and nonprofits can create Pages to share their message and services to their customers. When someone likes or follows a Page on Facebook, they will start seeing updates from that businesses’ Page on their News Feed. In order to create a Facebook Page, you must have a Facebook Profile. A little bit down in the article, we explain how to create a Facebook Profile and then from there establishing your Facebook Page.
Download our social media checklist now!

Why is a Facebook Page important for your business?
Think of your Facebook Page as a digital home front for your business. At its most basic, a business Page helps people find your business and learn more about what you have to offer. It’s a place where you can interact with your target audience and where people can reach out to chat and ask questions. It’s like a virtual storefront right there on Facebook where you know your customers spend at least some portion of their time.
Creating a Page helps you engage those customers where they are and build a community. It also allows you to use certain business tools that Facebook only allows for businesses with a page.
When you set up your business Page, you unlock the ability to advertise on Facebook. Advertising on Facebook can help you achieve a variety of goals, from building your audience to selling your products and services. Ads on Facebook may also help start conversations and build stronger customer relationships.
As just one example of a Facebook Page in action, imagine that you own a bakery. You want to connect with people on Facebook, so you set up a Page for your business. You can now use this Page to showcase your cakes and post photos of customers enjoying their custom-made bakery creations from your business. You can add your location and store hours, so people always know where and when to find you. You could also chat with customers and set up appointments right from your Page. As the holidays approach, you can then run targeted Facebook Ads to push the right Facebook users to purchase a delicious treat for their family gathering.
How to Create a Facebook Page for Your Business
Now that you understand what a Page is and why it’s important for your small business, it’s time to create a Page!
Below are the steps you’ll need to follow to create your Page. Because we know you might be on your computer or smartphone, we’ve provided instructions for both options.
1. Create a Facebook account.
You will need a Facebook account in order to create a Facebook Page for your business. If you don’t already have one (or if you have a personal profile but want to create a new profile that you’ll specifically use to handle your business), you can follow these steps to get started:
- Go to facebook.com (or open the Facebook app) and click Create New Account.
- Enter your name, email or mobile phone number, password, date of birth and gender.
- Click Sign Up.
- To finish creating your account, you need to confirm your email or mobile phone number.
2. Click “Create Page” and get started.
On both mobile and desktop devices you will see options that say “Create.”

Mobile:
- Go to your menu and click “Pages.”
- On the top left hand corner you’ll see an option that says “+Create.”
- Click “+Create.”
Desktop:
- Go to your menu and scroll down on the left hand side of the page until you see the option “Pages.”
- After you click “Pages,” you’ll see a tab that says “+Create New Page.”
- Click “+ Create New Page.”
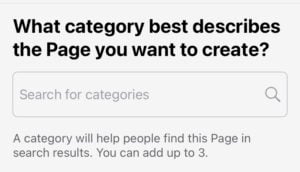
3. Choose a category.
Selecting the correct category will help people find your business’s Page in search results. You can add up to three categories. Some categories include Personal Blog, Restaurant, Art, etc.
Mobile:
- Clicking on the “Search for Categories” you can search and choose up to three categories that best fit your business.
- Once you’re all set, click “Next.”
Desktop:
- On the left hand side of the page, you’ll see a tab that says “Create a Page.” The second option down, you’ll see the tab that says “Category (required).”
- Like with the mobile device, begin typing up to three different categories that best fit for your business.
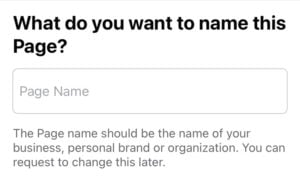
4. Name your Page.
The Page name should be the name of your business, personal brand, or organization. You can request to change this later if necessary, but it’s best to try and get it right on the first shot.
Mobile:
- You will see a tab box that says “Page Name.”
- Type the name of your company.
- Once you’re all set, click “Next.”
Desktop:
- On the left hand side of the page, you’ll see the tab that says “Create a Page.” The first option at the top says “Page name (required).”
- Type the name of your company in that spot.
- Click the big blue button that says “Create Page.”
- This will allow you to take more actions for your page.
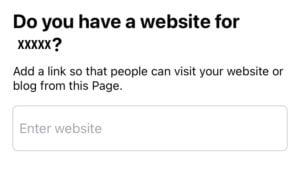
5. Add a website.
Do you have a website for your business? Add a link so that people can visit your website or blog from your Page. If you do not have a website, you can click the option “I don’t have a website.”
Mobile:
- You will see a tab that says “Enter website.”
- The quickest and easiest way is to copy and paste your website from your internet browser.
- If your business doesn’t have a website, click the option at the bottom that says “I don’t have a website” and click “Next.”
Desktop:
- Adding a website to your Page using a desktop takes place after you’ve finished adding photos (See step 5.)
- Adding a website is listed under the “About” section.
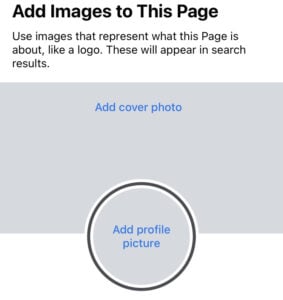
6. Add a profile and cover photo
Your profile and cover photos allow you the opportunity to begin building a connection with your audience visually. Try to choose photos that you think will resonate. While there isn’t an exact science to selecting these photos, many businesses will showcase their logo, product, or people.
Not sure how large your photos should be? We’ve found that your Facebook Profile picture should be 180 x 180 pixels, and your Facebook Cover photo should be 820 x 312 pixels.
Mobile:
- You will see two grey tabs that say “Add cover photo” and “Add a profile picture.”
- When you click on each one, you can upload a photo from your mobile device’s camera roll.
- Click “Next,” and your page has been created.
- You can go in and fill all details such as hours, location, phone number and address.
Desktop:
- Once you’ve hit “Create Page”, on the left hand size of the tab you’ll see two options to upload a profile picture and a cover photo.
- Once you’ve uploaded the photos, hit “Save.”
- Now you can begin to add further details such as your hours, phone numbers, email addresses, and posts.
Converting Your Personal Profile Into a Business Page
Have you already created a personal profile for your business? This is what many businesses did when they first joined Facebook (especially in the early days) before they knew that business Pages were an option.
Unfortunately, Facebook has explicitly stated that profiles are for people only, which means that they may delete profiles that are actually businesses. Additionally, profiles don’t have all of the benefits (analytics, the ability to run ads, etc.) that Pages do.
The good news is that if this describes you, you can convert your profile into a business page by following some easy steps.
Helping Your Business Digitally
According to a study by Facebook, 6 in 10 local businesses say having an online presence is important for their long-term success. Using social media apps such as Facebook, Instagram, and LinkedIn can help your business be seen by more audience members and can help you interact with current targeted customers.
At Pepperland, we specialize in content and inbound marketing, as well social strategies and link building. Click here to request a consultation today and see how Pepperland can help your business!