Written By:
Sean Henri
Traffic to your website has skyrocketed since you started blogging a year ago. It seems like things are really starting to come together, and your hard work implementing an inbound marketing strategy has begun to pay off. You tell your boss about your success and she says “Great, but who are they?”
“What do you mean?” you say.
‘The visitors to the blog. It’s great that we’re generating more traffic, but who are they? Do we know? Are they potential customers? Are we making any money from it?”
“Well, I’m not sure,” you reply, “We’ve had a few people subscribe to the blog so at least know who those people they are.. but only a small percentage of our blog readers actually subscribe.”
“Okay, well how do we change that?”
I think you know where this is going. You’ve built up a great asset by writing blog posts consistently each week, but failed to monetize that effort by focusing on converting those anonymous readers into subscribers. The “subscribe” form on the right is nice, but it’s not doing a good enough job at converting a high volume of your readers.
So how can you turn things around?
The Effectiveness Of Pop-Ups
Pop-Ups, Slide-Ins, and Welcome Mats have become quite popular in the past few years, annoying some visitors but proving to be highly effective. Some say these tactics have increased their opt-in rate as much as 600%.
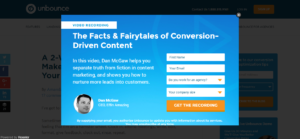
Popular services like SumoMe have risen to fill this need, offering a fantastic solution of apps including welcome mat pop-ups and exit-intent pop-ups. While these do integrate with popular email services like MailChimp, you’ll need to fork out at least $20/month to set up this integration.
The other challenge is attribution. How many of your blog subscribers are eventually turning into qualified leads or customers? Which traffic sources are generating the most valuable blog subscribers? This is not an easy challenge to solve.
This is where Leadin comes in
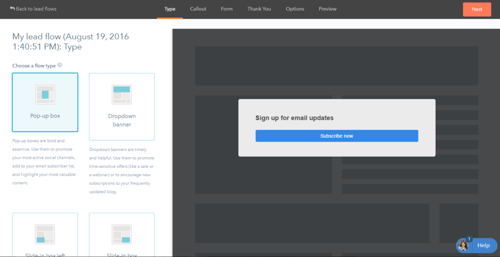
Offering similar solutions to SumoMe, Leadin is a completely free solution that allows you to create lead capture pop-ups that you can use to build your blog subscriber list. Leadin calls their pop-ups “Lead Flows” and offers several different types:
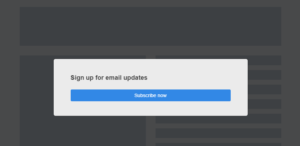 Pop-up Box: Pop-up boxes are bold and assertive. Use them to promote your most active social channels, add to your email subscriber list, and highlight your most valuable content.
- Dropdown Banner: These are timely and helpful. Use them to promote time-sensitive offers (like a sale or a webinar) or to encourage new subscriptions to your frequently updated blog.
- Slide-in Box Left & Right: Slide-ins are subtle and friendly. Use them to promote your content or add to your blog subscriber list.
Utilizing one of these flows should dramatically increase your conversion rate from visitor to subscriber, steadily growing your email list.
Tracking The ROI Of Your Blog & Newsletter
As you work this database of subscribers by sending weekly newsletters while continuing your blogging efforts, you’ll need to justify all that time and effort by proving the ROI of these efforts. Tools like Google Analytics can help with this, but only go so far. A typical analytics tool will track the source and channel that led to a form submission, but not all the way through your sales pipeline.
You also need an easy way to work your database of subscribers. Which subscribers are actively browsing your website and visiting your product pages? Who can you reach out to personally to see if there is a need?
HubSpot’s free CRM solves this problem by integrating with Leadin. It is a completely free tool that allows you to manage your lead database and sales process. When used in combination with Leadin it becomes an incredibly powerful free solution. Here are the steps to set up this integration.
Integrating Leadin with the HubSpot CRM
Creating a Hubspot CRM account and connecting it with Leadin will take about 10-15 minutes to get going. If you already have a Leadin account, you’ll need to abandon it and create a new one to link it to the CRM.
Step 1) Sign-Up for HubSpot’s Free CRM:
This takes just a few minutes to get going. Simply visit http://www.hubspot.com/products/crm and create an account Log-in and walk through the guided set-up process, or skip this step for later.
Step 2) Navigate To Settings:
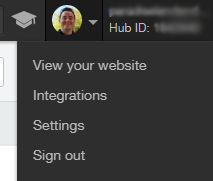
In the upper-right hand side of your screen, click the downward arrow by your profile picture. Click Settings.
Step 3) Go To Products & Add-ons:
On the left-hand side of your screen you’ll see a Products & Add-ons link in the menu. Click it. Once on this page scroll towards the bottom to the Add-ns area. Here is where you’ll see the option to activate Leadin. Activate it.
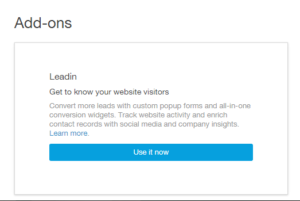
Step 4) Configure Leadin:
Follow Leadin’s easy to use wizard to create your first Lead Flow.
If you have existing forms on your website, be sure to allow collection of submissions from those forms by visiting Collected Forms, and clicking the activation toggle.
Now any form on your website will communicate with Leadin and the CRM.
Step 5) Link To Your Email Provider:
While in the Leadin configuration area, click Settings. On the left-hand side of your screen, you’ll see a menu option for Email Sync. This is where you can configure Leadin to automatically sync your captured subscribers with email services like Mailchimp, Constant Contact, AWeber, GetResponse, and Campaign Monitor.
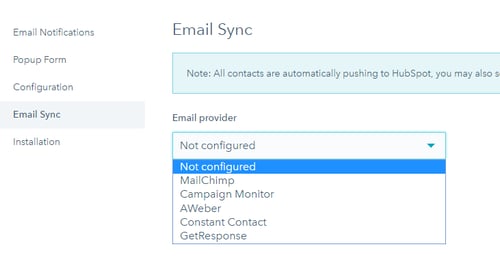
Step 6) Place The Tracking Code On Your Website:
While in settings, look for the Installation link on the left-hand side of your screen. Copy this code and insert it on every page of your website.
![]()
Step 7) Turn Your Subscribers Into Customers:
By setting up Leadin and the Hubspot CRM, you’ll have access to a full timeline of activity for each subscriber you’ve captured, including their original traffic source and the pages they’ve viewed on your website. You’ll also get important information about their company that you can use to identify potential prospects who might be worth reaching out to.
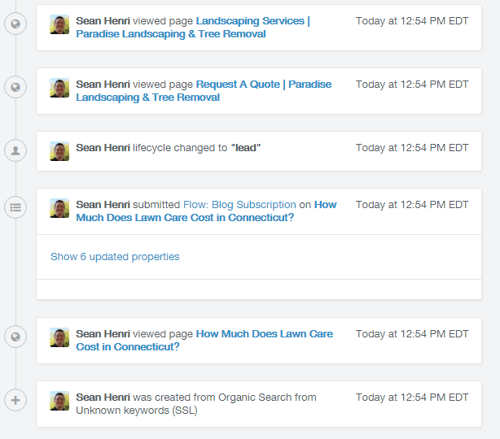
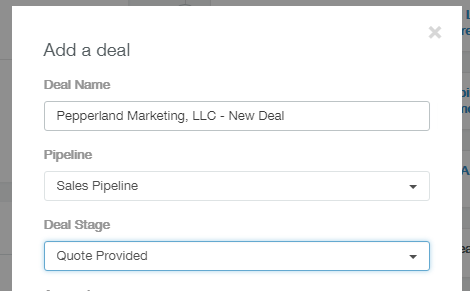
Once you’ve connected to a subscriber, if there’s a fit you can stay on top of your lead and easily manage them through the sales process by creating a Deal. Using this great feature will make it easy for you to trace actual revenue back to your blogging and email efforts.
Step 8) Reporting On ROI
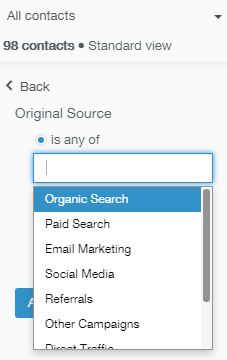
To show which marketing channels are producing the highest volume of subscribers, leads and revenue, export a list of all contacts and create a pivot chart showing a breakdown by leads, or better yet, by revenue.
You can also create customized lists by applying filters by different traffic sources like organic, ppc, or social media.
Bonus: Connecting Leadin With HubSpot Marking:
If you’re already using HubSpot Marketing for your email efforts, never fear! You can use Leadin’s great features too. It’s now possible to activate Leadin within your portal and have submissions automatically link to your subscriber list.
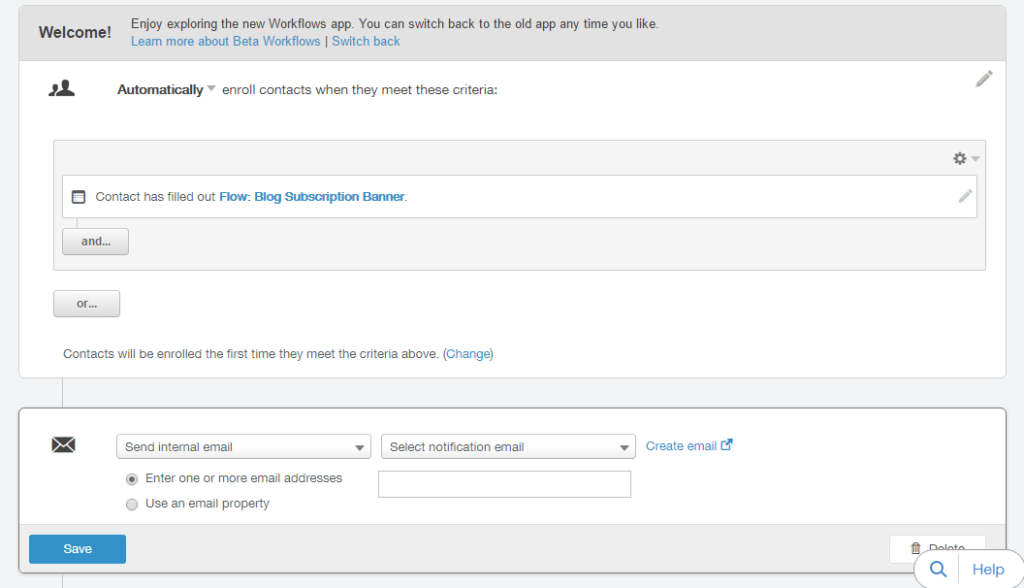
To do this you’ll need to follow the same steps above, plus one additional step. You’ll need to create a workflow that looks for a Lead Flow submission, and then adds them to your email subscriber list. HubSpot his made it someone difficult to see these forms in your portal, but know that they do exist. They will start with “Flow” as a prefix, so just search for that when selecting a form on the dropdown. It should look something like this:
That’s it! We hope you take advantage of these powerful free tools and take you newsletter to a whole new level.

